The youtube video by Stevan Dedovac is here:
http://www.youtube.com/watch?v=V-92YF87huo
Here is the code we hope to hack for using the Parallax Ping sensor we have with the Adafruit Motor Controller.
from https://github.com/bandless55/Arduino-Robot/blob/master/ping_robot.pde
by Stevan Dedovic authored August 13, 2011
/* please ignore any spelling errors.
Thanks. also, feel free to use this
for whatever you want.
(as long as i get to see thoes creations)
*/
#include <AFMotor.h>
AF_DCMotor motor(2, MOTOR12_1KHZ);
AF_DCMotor turn(1, MOTOR12_1KHZ); //Motor Shield Stuff
int pingPin = A5; //
int turnDelay = 2000; //how long a turn is. A larger number means a larger turn. and vice versa.
void setup(){ //runs the motor for a really short time and then waits 3 sec.
//This just gives me time to put the motor down before it starts up.
motor.setSpeed(175);
turn.setSpeed(255);
motor.run(FORWARD);
delay(25);
motor.run(RELEASE);
delay(3000);
}
void loop(){
int distance = 7; //distance, in inches, that triggers the turn sequence
int x = 0;
x = ping(); //get distance
if(x > distance){
motor.run(FORWARD);
}
else if(x < distance){
motor.run(BACKWARD); //instantly stop
delay(250);
left();
motor.run(RELEASE); //THIS RELEASE AND DELAY IS ESSENTIAL.
delay(100);
/* So about that comment above. I found out that after turning the robot in any direction,
the use of both the turning motor/servo and the movement motor used up all the power for the device.
So everytime the robot turns, I make sure to wait a little after cutting off power to both motors.
This ensures that the ping))) sensor recieves all the power from the batteries.
Then it reruns the loop and checks the distance, and either moves foward or turns.
*/
}
}
unsigned long ping(){ //arduino ping example: http://www.arduino.cc/en/Tutorial/Ping
long duration, inches, cm;
pinMode(pingPin, OUTPUT);
digitalWrite(pingPin, LOW);
delayMicroseconds(2);
digitalWrite(pingPin, HIGH);
delayMicroseconds(5);
digitalWrite(pingPin, LOW);
pinMode(pingPin, INPUT);
duration = pulseIn(pingPin, HIGH);
inches = microsecondsToInches(duration);
cm = microsecondsToCentimeters(duration);
return inches;
}
void left(){ //turns the robot to the left
turn.run(BACKWARD);
delay(turnDelay - 100);
turn.run(FORWARD);
delay(100);
motor.run(FORWARD);
delay(turnDelay);
turn.run(RELEASE);
}
void right(){ //turns the robot to the right
turn.run(FORWARD);
delay(turnDelay - 100);
turn.run(BACKWARD);
delay(100);
motor.run(FORWARD);
delay(turnDelay);
turn.run(RELEASE);
}
long microsecondsToInches(long microseconds) //more ping stuff
{
// According to Parallax's datasheet for the PING))), there are
// 73.746 microseconds per inch (i.e. sound travels at 1130 feet per
// second). This gives the distance travelled by the ping, outbound
// and return, so we divide by 2 to get the distance of the obstacle.
// See: http://www.parallax.com/dl/docs/prod/acc/28015-PING-v1.3.pdf
return microseconds / 74 / 2;
}
long microsecondsToCentimeters(long microseconds) //even more ping stuff
{
// The speed of sound is 340 m/s or 29 microseconds per centimeter.
// The ping travels out and back, so to find the distance of the
// object we take half of the distance travelled.
return microseconds / 29 / 2;
}
I've rewritten the code to include the other motor and eliminating the turn motor so we can run the Sea Sparrow:
/* please ignore any spelling errors.
Thanks. also, feel free to use this
for whatever you want.
(as long as i get to see thoes creations)
*/
#include <AFMotor.h>
AF_DCMotor rightmotor(3, MOTOR12_1KHZ);
AF_DCMotor leftmotor(1, MOTOR12_1KHZ); //Motor Shield Stuff
int pingPin = A5; //
int leftmotorDelay = 2000; //how long a turn is. A larger number means a larger turn. and vice versa.
int rightmotorDelay = 2000; //
void setup(){ //runs the motor for a really short time and then waits 3 sec.
//This just gives me time to put the motor down before it starts up.
Serial.begin(9600); // set up Serial library at 9600 bps
Serial.println("Sea Sparrow Motor test!");
rightmotor.setSpeed(175);
leftmotor.setSpeed(175);
rightmotor.run(FORWARD);
leftmotor.run(FORWARD);
delay(25);
rightmotor.run(RELEASE);
leftmotor.run(RELEASE);
delay(3000);
}
void loop(){
int distance = 7; //distance, in inches, that triggers the turn sequence
int x = 0;
x = ping(); //get distance
if(x > distance){
rightmotor.run(FORWARD);
leftmotor.run(FORWARD);
}
else if(x < distance){
rightmotor.run(BACKWARD); //instantly stop
leftmotor.run(BACKWARD);
delay(250);
left();
rightmotor.run(RELEASE); //THIS RELEASE AND DELAY IS ESSENTIAL.
leftmotor.run(RELEASE); //THIS RELEASE AND DELAY IS ESSENTIAL.
delay(100);
}
}
/* So about that comment above. I found out that after turning the robot in any direction,
//the use of both the turning motor/servo and the movement motor used up all the power for the device.
//So everytime the robot turns, I make sure to wait a little after cutting off power to both motors.
//This ensures that the ping))) sensor recieves all the power from the batteries.
//Then it reruns the loop and checks the distance, and either moves foward or turns.
*/
unsigned long ping(){ //arduino ping example: http://www.arduino.cc/en/Tutorial/Ping
long duration, inches, cm;
pinMode(pingPin, OUTPUT);
digitalWrite(pingPin, LOW);
delayMicroseconds(2);
digitalWrite(pingPin, HIGH);
delayMicroseconds(5);
digitalWrite(pingPin, LOW);
pinMode(pingPin, INPUT);
duration = pulseIn(pingPin, HIGH);
inches = microsecondsToInches(duration);
cm = microsecondsToCentimeters(duration);
return inches;
}
void left(){ //turns the robot to the left
leftmotor.run(BACKWARD);
delay(leftmotorDelay - 100);
leftmotor.run(RELEASE);
delay(100);
rightmotor.run(FORWARD);
delay(leftmotorDelay);
rightmotor.run(RELEASE);
}
void right(){ //turns the robot to the right
rightmotor.run(BACKWARD);
delay(rightmotorDelay - 100);
leftmotor.run(RELEASE);
delay(100);
rightmotor.run(FORWARD);
delay(rightmotorDelay);
rightmotor.run(RELEASE);
}
long microsecondsToInches(long microseconds) //more ping stuff
{
// According to Parallax's datasheet for the PING))), there are
// 73.746 microseconds per inch (i.e. sound travels at 1130 feet per
// second). This gives the distance travelled by the ping, outbound
// and return, so we divide by 2 to get the distance of the obstacle.
// See: http://www.parallax.com/dl/docs/prod/acc/28015-PING-v1.3.pdf
return microseconds / 74 / 2;
}
long microsecondsToCentimeters(long microseconds) //even more ping stuff
{
// The speed of sound is 340 m/s or 29 microseconds per centimeter.
// The ping travels out and back, so to find the distance of the
// object we take half of the distance travelled.
return microseconds / 29 / 2;
}
HERE IS SOME TRIAL CODE TO MERGE THE TWO:
#include <AFMotor.h>
AF_DCMotor rightmotor(3, MOTOR12_1KHZ);
AF_DCMotor leftmotor(1, MOTOR12_1KHZ); //Motor Shield Stuff
int pingPin = A5; //
int leftmotorDelay = 2000; //how long a turn is. A larger number means a larger turn. and vice versa.
int rightmotorDelay = 2000; //
unsigned long ping(){ //arduino ping example: http://www.arduino.cc/en/Tutorial/Ping
long duration, inches, cm;
pinMode(pingPin, OUTPUT);
digitalWrite(pingPin, LOW);
delayMicroseconds(2);
digitalWrite(pingPin, HIGH);
delayMicroseconds(5);
digitalWrite(pingPin, LOW);
pinMode(pingPin, INPUT);
duration = pulseIn(pingPin, HIGH);
inches = microsecondsToInches(duration);
cm = microsecondsToCentimeters(duration);
return inches;
}
void left(){ //turns the robot to the left
leftmotor.run(BACKWARD);
delay(leftmotorDelay - 100);
leftmotor.run(RELEASE);
delay(100);
rightmotor.run(FORWARD);
delay(leftmotorDelay);
rightmotor.run(RELEASE);
}
void right(){ //turns the robot to the right
rightmotor.run(BACKWARD);
delay(rightmotorDelay - 100);
leftmotor.run(RELEASE);
delay(100);
rightmotor.run(FORWARD);
delay(rightmotorDelay);
rightmotor.run(RELEASE);
}
long microsecondsToInches(long microseconds) //more ping stuff
{
// According to Parallax's datasheet for the PING))), there are
// 73.746 microseconds per inch (i.e. sound travels at 1130 feet per
// second). This gives the distance travelled by the ping, outbound
// and return, so we divide by 2 to get the distance of the obstacle.
// See: http://www.parallax.com/dl/docs/prod/acc/28015-PING-v1.3.pdf
return microseconds / 74 / 2;
}
long microsecondsToCentimeters(long microseconds) //even more ping stuff
{
// The speed of sound is 340 m/s or 29 microseconds per centimeter.
// The ping travels out and back, so to find the distance of the
// object we take half of the distance travelled.
return microseconds / 29 / 2;
}
bool readSerial () {
char in = Serial.read();
switch(in) {
case 'f':
rightmotor.run(FORWARD);
leftmotor.run(FORWARD);
case 'b':
rightmotor.run(BACKWARD);
leftmotor.run(BACKWARD);
case 's':
rightmotor.run(RELEASE);
leftmotor.run(RELEASE);
default:
return false;
}
return true;
}
bool delayWithSerial (unsigned int time) { ///////////////////////////////////////////////////////////////////////////////////////////////////////////////////////////////////////////
// this is basically what you need to write
unsigned int startTime = millis();
while(millis() - startTime > time) {
if(Serial.available()){
// if the readSerial function returns true, then this gives the feed back that it needs to exit the loop and be overwritten
if(readSerial()) return true;
}
}
return false; // here we are saying that we ended the time normally so we should keep going with the loop
}
void setup () {
Serial.begin(9600); // I personally like 115200 better, or maybe 38400
Serial.println("Sea Sparrow Motor test!");
rightmotor.setSpeed(175);
leftmotor.setSpeed(175);
rightmotor.run(FORWARD);
leftmotor.run(FORWARD);
delayWithSerial(25);
rightmotor.run(RELEASE);
leftmotor.run(RELEASE);
delayWithSerial(3000);
}
void loop () {
if(Serial.available()) {
readSerial();
}
if(ping() < 3) {
rightmotor.run(BACKWARD); //instantly stop
leftmotor.run(BACKWARD);
if(delayWithSerial(250)) return; // here we get the return from from the read Serial based back and then break the loop funciton, this should return it to the top of the loop function
left();
rightmotor.run(RELEASE); //THIS RELEASE AND DELAY IS ESSENTIAL.
leftmotor.run(RELEASE); //THIS RELEASE AND DELAY IS ESSENTIAL.
if(delayWithSerial(100)) return; // see comment above
}
}
Now that we are using the DFRobot 2A Motor Shield, we need to learn its coding too. Here is an example:
//Arduino PWM Speed Control:
int E1 = 6;
int M1 = 7;
int E2 = 5;
int M2 = 4;
void setup()
{
pinMode(M1, OUTPUT);
pinMode(M2, OUTPUT);
}
void loop()
{
// int value;
// for(value = 0 ; value <= 255; value+=5)
//
// {
digitalWrite(M1,HIGH);
digitalWrite(M2, HIGH);
// analogWrite(E1, value); //PWM Speed Control
// analogWrite(E2, value); //PWM Speed Control
analogWrite(E1, 255); //PWM Speed Control
analogWrite(E2, 255); //PWM Speed Control
delay(30);
// }
}

Tuesday, January 31, 2012
Friday, January 27, 2012
ASCII Table ~ Character Map
When running through the Xbee tutorials from Sparkfun, the ASCII table serial monitor output looked too valuable to discard, so I've saved it below. Now if you want to know what each of the characters on your keyboard map out to in decimal, hexadecimal, octadecimal and binary, here they are. This could be useful for future programming, so it is a nice resource to have handy!
ASCII Table ~ Character Map
!, dec: 33, hex: 21, oct: 41, bin: 100001
", dec: 34, hex: 22, oct: 42, bin: 100010
#, dec: 35, hex: 23, oct: 43, bin: 100011
$, dec: 36, hex: 24, oct: 44, bin: 100100
%, dec: 37, hex: 25, oct: 45, bin: 100101
&, dec: 38, hex: 26, oct: 46, bin: 100110
', dec: 39, hex: 27, oct: 47, bin: 100111
(, dec: 40, hex: 28, oct: 50, bin: 101000
), dec: 41, hex: 29, oct: 51, bin: 101001
*, dec: 42, hex: 2A, oct: 52, bin: 101010
+, dec: 43, hex: 2B, oct: 53, bin: 101011
,, dec: 44, hex: 2C, oct: 54, bin: 101100
-, dec: 45, hex: 2D, oct: 55, bin: 101101
., dec: 46, hex: 2E, oct: 56, bin: 101110
/, dec: 47, hex: 2F, oct: 57, bin: 101111
0, dec: 48, hex: 30, oct: 60, bin: 110000
1, dec: 49, hex: 31, oct: 61, bin: 110001
2, dec: 50, hex: 32, oct: 62, bin: 110010
3, dec: 51, hex: 33, oct: 63, bin: 110011
4, dec: 52, hex: 34, oct: 64, bin: 110100
5, dec: 53, hex: 35, oct: 65, bin: 110101
6, dec: 54, hex: 36, oct: 66, bin: 110110
7, dec: 55, hex: 37, oct: 67, bin: 110111
8, dec: 56, hex: 38, oct: 70, bin: 111000
9, dec: 57, hex: 39, oct: 71, bin: 111001
:, dec: 58, hex: 3A, oct: 72, bin: 111010
;, dec: 59, hex: 3B, oct: 73, bin: 111011
<, dec: 60, hex: 3C, oct: 74, bin: 111100
=, dec: 61, hex: 3D, oct: 75, bin: 111101
>, dec: 62, hex: 3E, oct: 76, bin: 111110
?, dec: 63, hex: 3F, oct: 77, bin: 111111
@, dec: 64, hex: 40, oct: 100, bin: 1000000
A, dec: 65, hex: 41, oct: 101, bin: 1000001
B, dec: 66, hex: 42, oct: 102, bin: 1000010
C, dec: 67, hex: 43, oct: 103, bin: 1000011
D, dec: 68, hex: 44, oct: 104, bin: 1000100
E, dec: 69, hex: 45, oct: 105, bin: 1000101
F, dec: 70, hex: 46, oct: 106, bin: 1000110
G, dec: 71, hex: 47, oct: 107, bin: 1000111
H, dec: 72, hex: 48, oct: 110, bin: 1001000
I, dec: 73, hex: 49, oct: 111, bin: 1001001
J, dec: 74, hex: 4A, oct: 112, bin: 1001010
K, dec: 75, hex: 4B, oct: 113, bin: 1001011
L, dec: 76, hex: 4C, oct: 114, bin: 1001100
M, dec: 77, hex: 4D, oct: 115, bin: 1001101
N, dec: 78, hex: 4E, oct: 116, bin: 1001110
O, dec: 79, hex: 4F, oct: 117, bin: 1001111
P, dec: 80, hex: 50, oct: 120, bin: 1010000
Q, dec: 81, hex: 51, oct: 121, bin: 1010001
R, dec: 82, hex: 52, oct: 122, bin: 1010010
S, dec: 83, hex: 53, oct: 123, bin: 1010011
T, dec: 84, hex: 54, oct: 124, bin: 1010100
U, dec: 85, hex: 55, oct: 125, bin: 1010101
V, dec: 86, hex: 56, oct: 126, bin: 1010110
W, dec: 87, hex: 57, oct: 127, bin: 1010111
X, dec: 88, hex: 58, oct: 130, bin: 1011000
Y, dec: 89, hex: 59, oct: 131, bin: 1011001
Z, dec: 90, hex: 5A, oct: 132, bin: 1011010
[, dec: 91, hex: 5B, oct: 133, bin: 1011011
\, dec: 92, hex: 5C, oct: 134, bin: 1011100
], dec: 93, hex: 5D, oct: 135, bin: 1011101
^, dec: 94, hex: 5E, oct: 136, bin: 1011110
_, dec: 95, hex: 5F, oct: 137, bin: 1011111
`, dec: 96, hex: 60, oct: 140, bin: 1100000
a, dec: 97, hex: 61, oct: 141, bin: 1100001
b, dec: 98, hex: 62, oct: 142, bin: 1100010
c, dec: 99, hex: 63, oct: 143, bin: 1100011
d, dec: 100, hex: 64, oct: 144, bin: 1100100
e, dec: 101, hex: 65, oct: 145, bin: 1100101
f, dec: 102, hex: 66, oct: 146, bin: 1100110
g, dec: 103, hex: 67, oct: 147, bin: 1100111
h, dec: 104, hex: 68, oct: 150, bin: 1101000
i, dec: 105, hex: 69, oct: 151, bin: 1101001
j, dec: 106, hex: 6A, oct: 152, bin: 1101010
k, dec: 107, hex: 6B, oct: 153, bin: 1101011
l, dec: 108, hex: 6C, oct: 154, bin: 1101100
m, dec: 109, hex: 6D, oct: 155, bin: 1101101
n, dec: 110, hex: 6E, oct: 156, bin: 1101110
o, dec: 111, hex: 6F, oct: 157, bin: 1101111
p, dec: 112, hex: 70, oct: 160, bin: 1110000
q, dec: 113, hex: 71, oct: 161, bin: 1110001
r, dec: 114, hex: 72, oct: 162, bin: 1110010
s, dec: 115, hex: 73, oct: 163, bin: 1110011
t, dec: 116, hex: 74, oct: 164, bin: 1110100
u, dec: 117, hex: 75, oct: 165, bin: 1110101
v, dec: 118, hex: 76, oct: 166, bin: 1110110
w, dec: 119, hex: 77, oct: 167, bin: 1110111
x, dec: 120, hex: 78, oct: 170, bin: 1111000
y, dec: 121, hex: 79, oct: 171, bin: 1111001
z, dec: 122, hex: 7A, oct: 172, bin: 1111010
{, dec: 123, hex: 7B, oct: 173, bin: 1111011
|, dec: 124, hex: 7C, oct: 174, bin: 1111100
}, dec: 125, hex: 7D, oct: 175, bin: 1111101
~, dec: 126, hex: 7E, oct: 176, bin: 1111110
If an X-bee can control RGB on an LED, why not the motors of a Sea Perch, see?

Good morning, Playful PORPOISEs!
Today we make preparations for wireless communication with our Sea Sparrow
(and via tether, our Sea Perch). How?
We will use Xbee Shields.
What are they?
According to Sparkfun's tutorial:
"Normally when you send data from your Arduino to your computer it
travels over a USB cable. You can use XBee as a "cable replacement",
this means the data will travel wirelessly between the Arduino and your
computer without the need for a cable to connect the two devices. "
I tried doing this last week using the Parallax Xbee shield kit I got from Frye's electronics.
I got the two Xbee units talking via the serial monitor (doing the echo sketch) but that was as far as
far as I got because of the difficulty of wiring the pins of the Xbee board to the Arduino.
Obviously Parallax makes their Xbee units to talk to their Basic Stamp controller or Propellor
Microcontroller - it is, after all, their product.
So I decided to go to Sparkfun for their X-Bee Shield Kit, and because it mounts directly ON the arduino
things are ever so much simpler!
With the Sparkfun Shield Kit and their on-line tutorials you are up and running right outside of the box.
No difficult configuring or wiring of the Xbees! Yay!
The getting started tutorial is fun, and it is great if you have the Sparkfun Arduino Inventor's kit because
the second sketch in it (replicated below) makes use of the Circuit-12 three color RGB LED tutorial using
this circuit here:

 As you will readily appreciate from the quick video we made below here in the Motion Picture
Marine lab, once you have used the  XBeeCableReplacement.pde sketch to send signals from the
X-bee Explorer (connected to a computer) to a remote battery powered Arduino
with the X-bee shield connected to a four pin RGB LED and demonstrated to yourself that you can
turn on and off the different colored lights using commands from the keyboard via the serial
monitor, why then you know you can modify that code slightly to turn on and off different motors from
a distance too!
_I think you know where I'm going with this! Instead of using the 'r' 'g' and 'b' keys to turn
on red green and blue lights, we can use 'f', 'b' and 'u' to control our sea perch motors! Yup,
this unlocks the possibility of putting the controller on the Sea Sparrow, tethered to the Sea Perch
underwater, and stand safely on the shore with a laptop or smart phone and tell the sea perch (and the sea
sparrow) where to go!
Cool, huh?
The tutorial codes are replicated below in case the github site is down for some reason.
Enjoy!
PS: It appears that contrary to the instructions below, you DON'T have to always remove the Xbee Shield or the Xbee itself
every time you want to upload a program to the Arduino; the work around is to place the toggle
switch on the shield from UART to DLINE when you are loading programs from the USB
Port of your computer to the board, and back to UART when you are using it to send information
to the XBee:
"When the switch on the shield is in the "DLINE" position the hardware
serial port (which uses the RX and TX pins) of the Arduino can be used
for uploading sketches...When the switch on the shield is in the "UART" position the hardware
serial port of the Arduino is used to transfer data from the Arduino to
the XBee module."
This ability to use a simple switch on the Sparkfun Shield to upload programs to the
Arduino (in DLINE position) and then switch to UART to use the Xbee is a great feature for
students since two much removing of the XBee or shield will ultimately damage the pins
or the chips themselves. Thanks Sparkfun!
__________________________________________________________________________
from the github sparkfun site:
(copy and paste everything below)
/*

  XBeeSerialEcho -- Simple sketch for demonstrating two-way XBee communication

  Requires:

    (These items are found in the SparkFun XBee Wireless Kit Retail product
     or can be obtained individually.)

       * 1 x SparkFun XBee Explorer USB

       * 1 x SparkFun XBee Wireless Shield

       * 2 x "Series 1" Digi XBee communication modules


  Instructions:

    * Upload this sketch as normal to your Arduino without the XBee Wireless
      Shield connected.

    * Disconnect the Arduino from your computer.

    * Both XBee modules should be configured to use their default
      configuration and communicate at 9600 baud.

    * One XBee module should be connected to the XBee Explorer board.
      Ensure the orientation of the XBee module is correct with the
      beveled end of the module pointing away from the USB connector
      so the module outline matches the diagonal white lines
      silkscreened on the board.

    * The other XBee module should be connected to the XBee Wireless
      Shield for the Arduino. Again, ensure the orientation of the
      XBee module is correct with the beveled end pointing over the
      edge of the shield away from the USB connector on the Arduino
      board. The outline of the module should match the the diagonal
      white lines silkscreened on the shield.

    * The small switch located near the TX/RX pins on the shield
      should be set to the "UART" position so the XBee module is
      connected to the hardware serial port on the Arduino.

    * Connect the XBee Wireless Shield to your Arduino.

    * Connect the XBee Explorer USB to your computer with a mini-USB cable.

    * Select the correct serial port for your XBee Explorer USB from the
      Tools > Serial Port menu in the Arduino IDE.

    * Connect your Arduino with the XBee Wireless Shield on it to a
      power source--either a battery, a "wall wart" power adapter or
      another USB port.

    * Open the Serial Monitor window of the Arduino IDE and make sure
      the correct communication speed of "9600 baud" is selected from
      the pop-up menu in the lower right corner of the Serial Monitor
      window.

    * Start typing and whenever you press the button labeled "Send" or
      press the "Enter" or "Return" key what you type should be echoed
      back to you. (If only "garbage" is returned you probably have
      the XBee modules configured for the wrong speed.  Reconfigure
      them to operate at 9600 baud and try again.)

    * The text you type is sent from your computer, over the USB cable
      to the XBee Explorer USB board. From there it is directed to the
      XBee module on the board which sends it wirelessly to the second
      XBee module on the shield. The second XBee module then directs
      the text to the hardware serial port of the Arduino. Your
      Arduino reads each character of the text from the serial port
      and then sends it back (that is, "echos" it) through the serial
      port to the second XBee module. The second XBee module then
      sends the echoed text wirelessly to the first XBee module which
      directs it to the Explorer USB board which sends it back up the
      USB cable to the Arduino IDE serial monitor window. *Phew*.


  Enhancements:

    * You can change the configuration of the XBee wireless modules to
      communicate at a faster speed (try 19200 baud and then 57600
      baud) if you also change the communication speed of the
      "Serial.begin()" line below and in the Serial Monitor window of
      the Arduino IDE to match.


   For more details and help read the XBee Shield and Explorer USB
   Quickstart Guide:

      <http://sparkfun.com/tutorials/192>

 */

void setup() {
  Serial.begin(9600); // See "Enhancements" above to learn when to change this.
}

void loop() {
  if (Serial.available()) {
    Serial.print((char) Serial.read());
    delay(10);
  }
}
____________________________________________________________________
After running that test successfully, I run this test (code below is from this site):
/*

  XBeeCableReplacement.pde

  Control the color of an RGB LED wirelessly via XBee.


  Required (in addition to your Arduino):

    (These items are found in the SparkFun XBee Wireless Kit Retail product
     or can be obtained individually.)

       * 1 x SparkFun XBee Explorer USB

       * 1 x SparkFun XBee Wireless Shield

       * 2 x "Series 1" Digi XBee communication modules


  Instructions:

    * Ensure both XBee communication modules are configured to use
      their default configuration and communicate at 9600 baud.

    * Put the XBee Wireless Shield onto your Arduino but do not insert
      the XBee communication module.

    * Wire an RGB LED to your Arduino as shown in CIRC-12 of the
      SparkFun Inventor's Guide.

    * Connect your Arduino to your computer using a USB cable.

    * Upload this sketch as normal to your Arduino.

    * Test the functionality of the sketch works when connected via
      the USB cable. Open the Serial Monitor window and ensure it is
      set to communicate at 9600 baud. Type a sequence of one or more
      of the characters 'r', 'g' and 'b' and then press the "Send"
      button. The RGB LED should change color in response. A space
      character in the sequence will cause the LED to turn off.

    * Disconnect your Arduino from your computer.

    * Insert one XBee module into the XBee Explorer board. Ensure the
      orientation of the XBee module is correct with the beveled end
      of the module pointing away from the USB connector so the module
      outline matches the diagonal white lines silkscreened on the
      board.

    * Insert the other XBee module into the XBee Wireless Shield.
      Again, ensure the orientation of the XBee module is correct with
      the beveled end pointing over the edge of the shield away from
      the USB connector on the Arduino board. The outline of the
      module should match the the diagonal white lines silkscreened on
      the shield.

    * The small switch located near the TX/RX pins on the shield
      should be set to the "UART" position so the XBee module is
      connected to the hardware serial port on the Arduino.

    * Connect the XBee Explorer USB to your computer with a mini-USB
      cable.

    * Select the correct serial port for your XBee Explorer USB from
      the Tools > Serial Port menu in the Arduino IDE.

    * Connect your Arduino with the XBee Wireless Shield on it to a
      power source--either a battery, a "wall wart" power adapter or
      another USB port.

    * Open the Serial Monitor window of the Arduino IDE and make sure
      the correct communication speed of "9600 baud" is selected from
      the pop-up menu in the lower right corner of the Serial Monitor
      window.

    * You may need to press the reset button on the shield to
      redisplay the instructions.

    * Control your LED as before--except you've now replaced the cable
      with air!


   For more details and help read the XBee Shield and Explorer USB
   Quickstart Guide:

      <http://sparkfun.com/tutorials/192>

 */

// LED leads connected to PWM pins
const int RED_LED_PIN = 9;
const int GREEN_LED_PIN = 10;
const int BLUE_LED_PIN = 11;

// Change this value if you want fast color changes
const int WAIT_TIME_MS = 500;


void setLedColour(int redIntensity, int greenIntensity, int blueIntensity) {
   /*

      This routine sets the PWM value for each color of the RGB LED.

    */
   analogWrite(RED_LED_PIN, redIntensity);
   analogWrite(GREEN_LED_PIN, greenIntensity);
   analogWrite(BLUE_LED_PIN, blueIntensity);
}


void setup() {
  // Configure the serial port and display instructions.
  Serial.begin(9600);
  Serial.println("Send the characters 'r', 'g' or 'b' to change LED colour:");
}


void loop() {

  // When specific characters are sent we change the current color of the LED.
  if (Serial.available()) {
    int characterRead = Serial.read();

    // If the character matches change the state of the LED,
    // otherwise ignore the character.
    switch(characterRead) {
       case 'r':
         setLedColour(255, 0, 0);
         break;

       case 'g':
         setLedColour(0, 255, 0);
         break;

       case 'b':
         setLedColour(0, 0, 255);
         break;

       case ' ':
         setLedColour(0, 0, 0);
         break;

       default:
         // Ignore all other characters and leave the LED
         // in its previous state.
         break;
    }

    delay(WAIT_TIME_MS);
  }

}
Wednesday, January 25, 2012
Washington Prep uses a short day to make long strides...

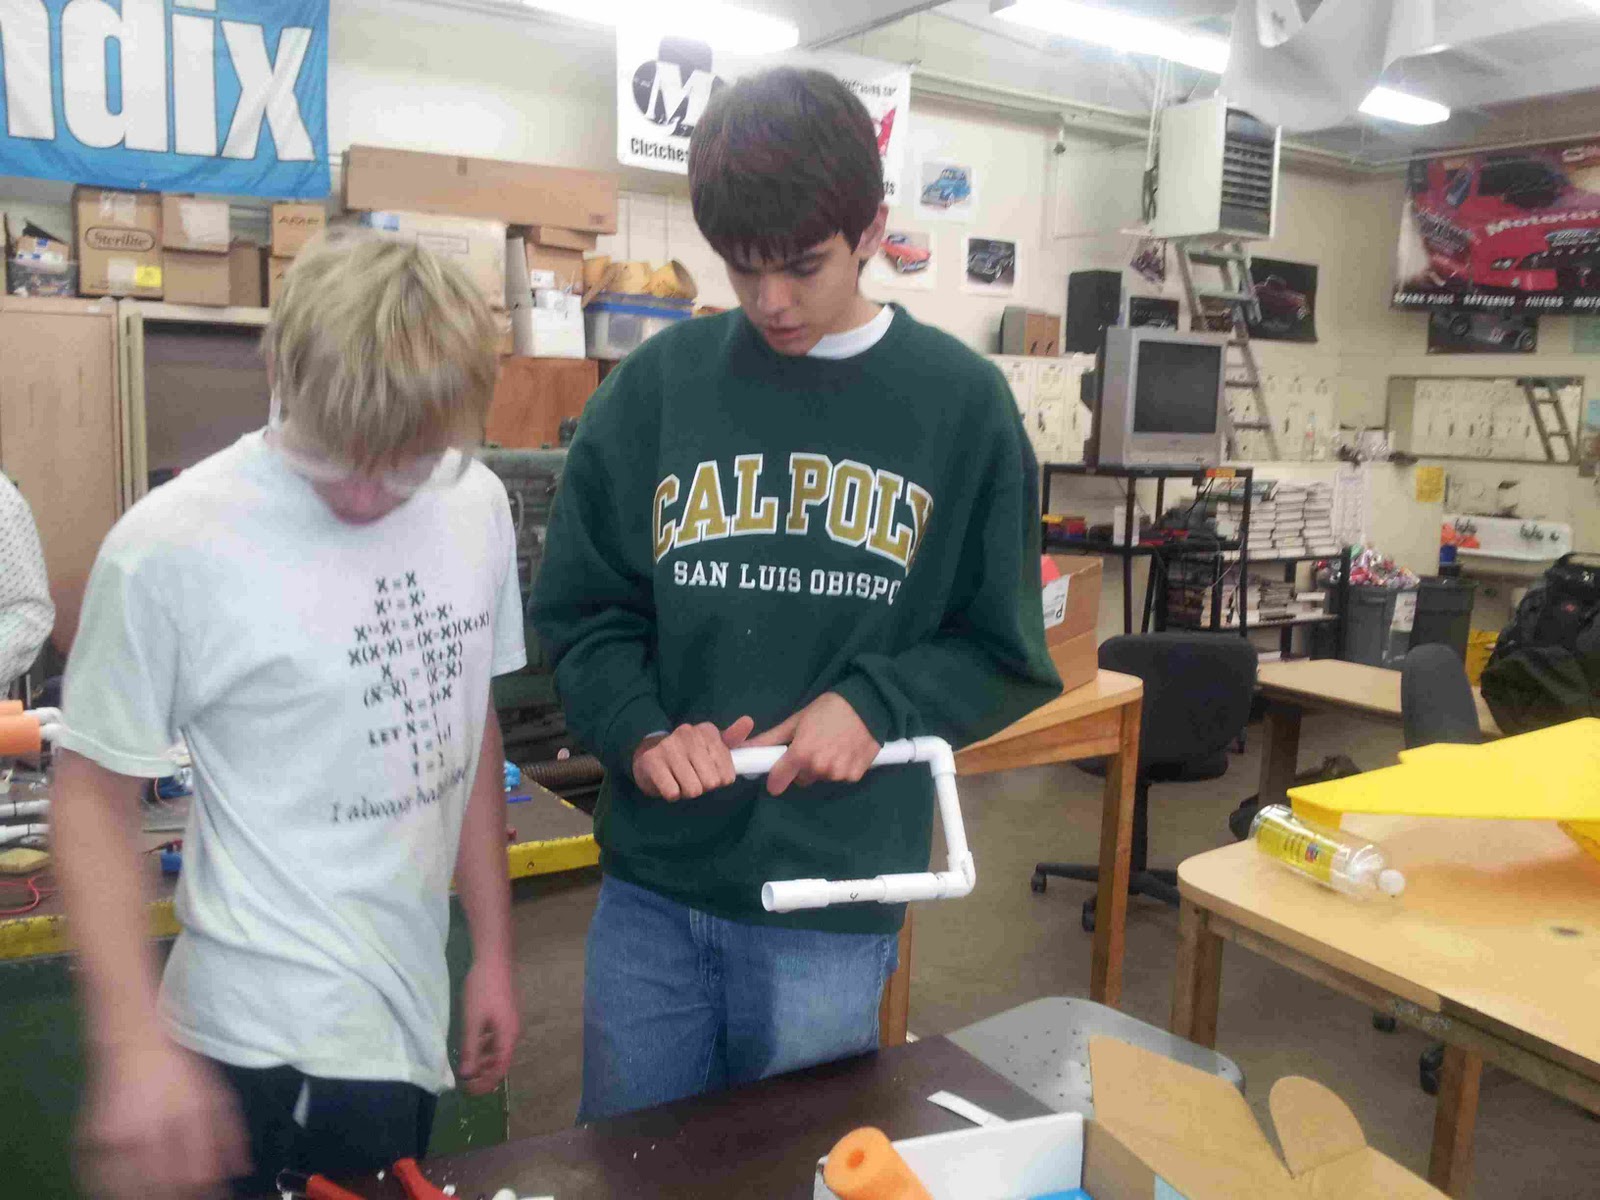
Tuesday January 24th was a short day in the Los Angeles Unified School District, which means the students around the city got out early. But three intrepid young men and women in our PORPOISE initiative stayed long after school ended, showing that they have "the right stuff" for putting America back on its feet -- and for getting their feet wet and wetter in this landmark aquatic robotics program.
When most of their friends left school around lunchtime, Erica Ponce, EZMoney Harper and Luis Camacho stayed on, awaiting PORPOISE team leader Dr. T.H. Culhane's arrival from Motion Picture Marine in Venice.
Culhane, who spent a decade as a science teacher in the Los Angeles inner city back in the early 90s, returned to his old stomping grounds in the U.S. from another decade working on science and technology training issues overseas (in Europe and the Middle East) to continue the crusade to improve education for all. And true to his eco-tech credentials, Culhane continued his tradition of taking public transit, which is notoriously time consuming in a city famed for its car culture. This, however, meant that he couldn't arrive at the school any earlier than the usual 3:00 meeting time.
The students were patient though, and stayed until nearly 6:00 to bring the Sea Perch hack they had started the previous week to completion.
They took the Boatduinode.pde file contributed by a young man in Texas who is generously helping us develop our program (Andy 'Tuna' Harris, who, in true Tom Sawyer fashion, developed the code so people around the world could control his mom's pool skimmer from their web browsers and help him clean the family pool!) and mashed it together with the Adafruit Motor Test sketch and came up with the following code:
____________________________________________________________
#include <AFMotor.h>
AF_DCMotor motor1(1, MOTOR12_64KHZ); // create motor #1, 64KHz pwm
AF_DCMotor motor2(2, MOTOR12_64KHZ); // create motor #2, 64KHz pwm
AF_DCMotor motor3(3, MOTOR12_64KHZ); // create motor #3, 64KHz pwm
void setup() {
Serial.begin(9600); // set up Serial library at 9600 bps
Serial.println("Motor test!");
motor1.setSpeed(200); // set the speed to 200/255, use motor1 on shield as left Sea Perch motor
motor2.setSpeed(200); // set the speed to 200/255, use motor2 on shield as up-down Sea Perch motor
motor3.setSpeed(200); // set the speed to 200/255, use motor3 on shield as right Sea Perch motor
}
void loop() {
if (Serial.available() > 0) {
switch(Serial.read()) {
case 'l':
motor1.run(FORWARD); // turn on motor1, which is left motor going forward
motor2.run(RELEASE); // stop motor2, the up-down motor
motor3.run(RELEASE); //stop motor3 which is right motor
Serial.println("You sent 'l' = Left motor forward, Right motor off, turning left");
break;
case 'r':
motor1.run(RELEASE); // stop motor1
motor2.run(RELEASE); // stop motor2, the up down motor
motor3.run(FORWARD); //turn on motor3, the right motor, going forward
Serial.println("You sent 'r' = left motor off, right motor forward, turning right");
break;
case 'L':
motor1.run(FORWARD); // turn on motor1 forward
motor2.run(RELEASE); // turn motor2, the up down motor, off
motor3.run(BACKWARD); //turn on motor3 which is right motor, spinning backward
Serial.println("You sent 'L' = left motor forward, right motor backward, spinning left");
break;
case 'R':
motor1.run(BACKWARD); //turn on motor1 backward
motor2.run(RELEASE); //stop motor2 which is up down motor
motor3.run(FORWARD); //turn on motor3, the right motor on Sea Perch, forward
Serial.println("You sent 'R' = left motor backward, right motor forward, spinning right");
break;
case 'f':
motor1.run(FORWARD);
motor3.run(FORWARD);
Serial.println("You sent 'f' = Both motors forward, full steam ahead");
break;
case 'b':
motor1.run(BACKWARD);
motor3.run(BACKWARD);
Serial.println("You sent 'b' = Both motors reverse, moving backward");
break;
case 's':
motor1.run(RELEASE); // stopped
motor2.run(RELEASE); // stopped
motor3.run(RELEASE);
Serial.println("You sent 's' = Boat stopped");
break;
case 'd':
motor2.run(FORWARD);
Serial.println("You sent 'd' = dive motor activated, diving");
break;
case 'u':
motor2.run(BACKWARD);
Serial.println("You sent 'u' = dive motor activated, surfacing");
break;
}
}
}
_________________________________________________________________

This enabled Erica, Luis and EZ to use the serial monitor of the Arduino IDE on EZ's laptop to control all three Sea Perch motors using an Arduino Uno with an Adafruit Motorshield mounted on it. EZ explains what they are doing in the following videos:
In the above video EZ explains the code and how it controls the motors.
In the video above EZ explains how the Arduino motor controller is connected to the Sea Perch Controller.
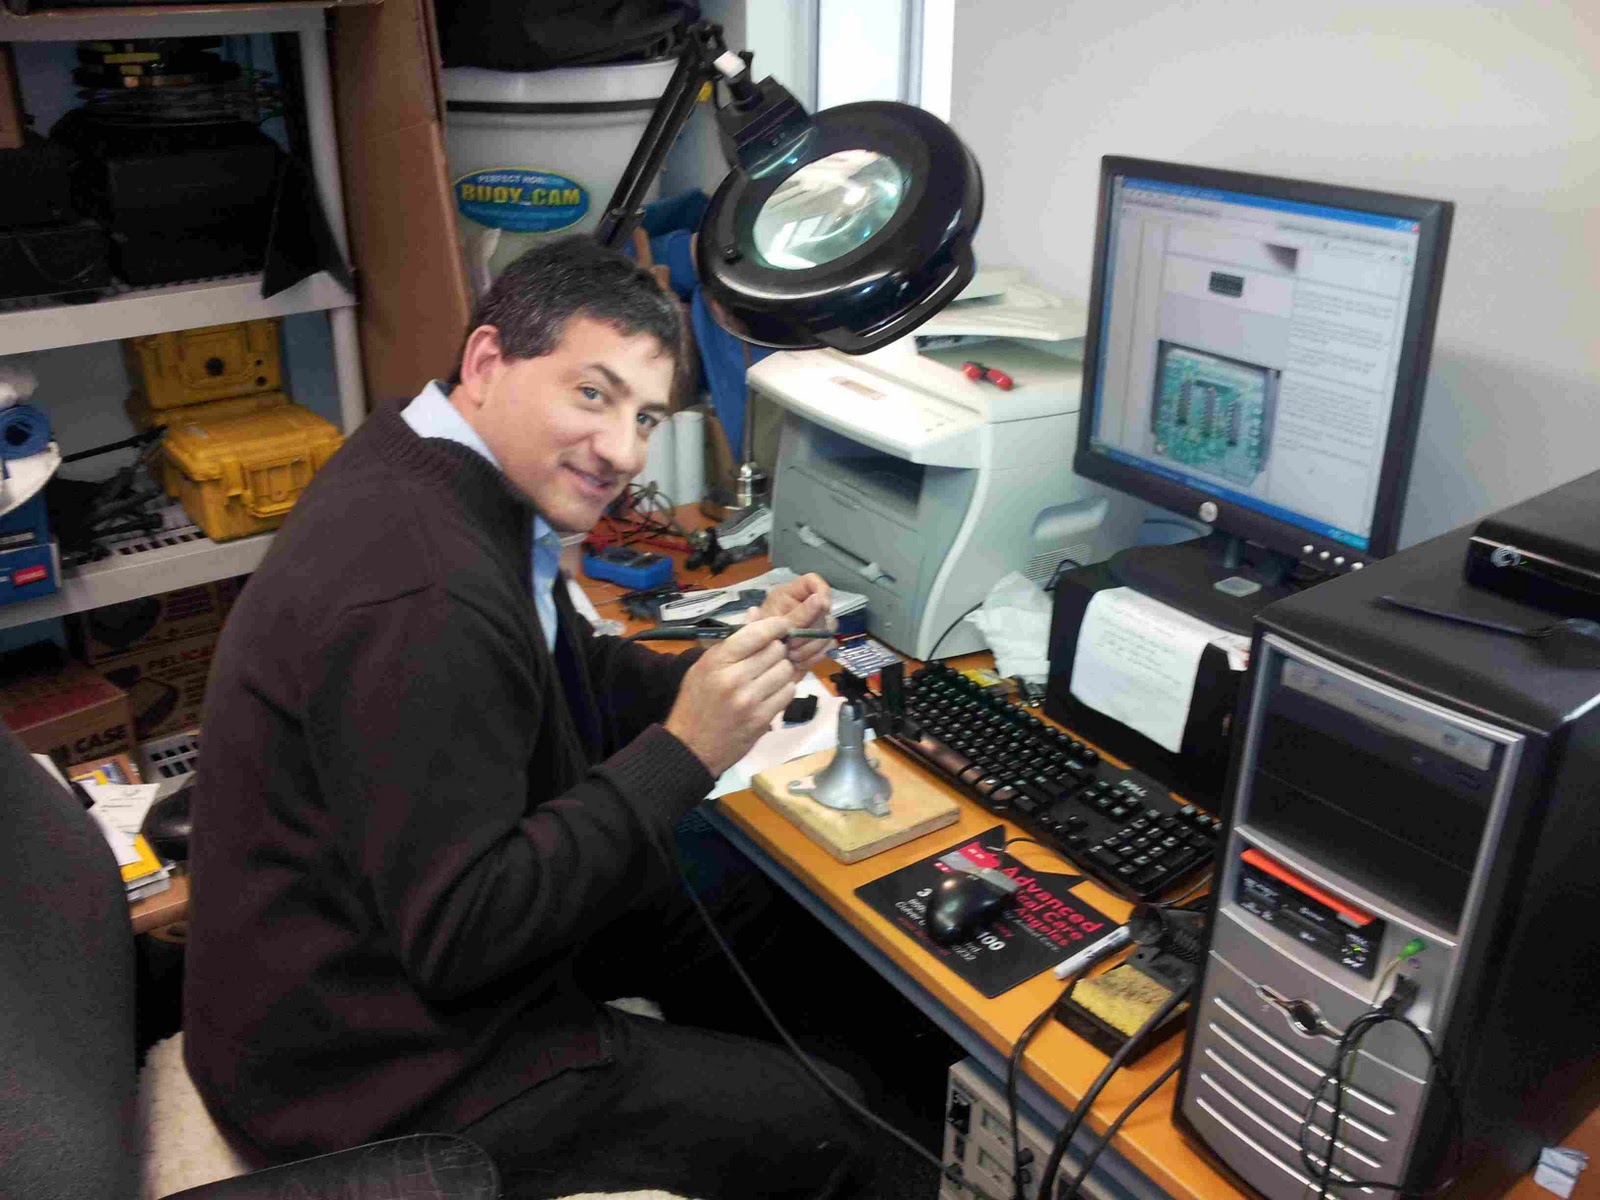
After we had explored the code and how it works with the Sea Perch motors we started soldering the new MIT Sea Perch Sensor Suite PCB boards to start giving sense and sensibility to the little ROV. Good times ahead!


Friday, January 20, 2012
Hacked RC Car at Washington Prep and Sea Perch Build and Venice H.S.


In this video Erica and Johayra are steering the car via the Boatduinode code that we got from Andy 'Tuna' Harris in Texas:
And in this video the boys get a chance to play as EZMoney and Louis further mod Andy's code and turn it into "Carduinode" code, specifically for running the RC car:
The code we are using is:
HACKED from Boatduinode by Andy 'Tuna' Harris. Here it is:
* f (activates rear motor in forward motion)
* r (activates front motor in right direction)
* b (activates rear motor in backward motion)
* l (activates front motor in left direction)
* s (stops rear motor)
* a (aligns front wheels motor)
* S (stops both motors)
*
* Note that pulling the pins LOW activates the motors, and
* pulling them HIGH stops them. I have no clue why, so I created
* power_on() and power_off() helper functions to make it less
* confusing.
int car_forward = 8;
int wheels_right = 9;
int wheels_left = 10;
int car_backward = 11;
int i;
void setup() {
Serial.begin(9600);
pinMode(car_forward, OUTPUT);
pinMode(wheels_right, OUTPUT);
pinMode(car_backward, OUTPUT);
pinMode(wheels_left, OUTPUT);
digitalWrite(car_forward, HIGH);
digitalWrite(wheels_right, HIGH);
digitalWrite(car_backward, HIGH);
digitalWrite(wheels_left, HIGH);
}
void power_on(int pin)
{
digitalWrite(pin, LOW);
}
void power_off(int pin)
{
digitalWrite(pin, HIGH);
}
void loop()
{
if (Serial.available() > 0) {
switch(Serial.read()) {
case 'f':
power_off(car_backward);
power_on(car_forward);
Serial.println("rear motor activated, moving forward");
break;
case 'r':
power_off(wheels_left);
power_on(wheels_right);
Serial.println("front motor activated, wheels turn right");
break;
case 'b':
power_off(car_forward);
power_on(car_backward);
Serial.println("rear motor activated, moving backward");
break;
case 'l':
power_off(wheels_right);
power_on(wheels_left);
Serial.println("front motor activated, wheels turn left");
break;
case 's':
power_off(car_forward);
power_off(car_backward);
Serial.println("rear motor stopped");
break;
case 'a':
power_off(wheels_right);
power_off(wheels_left);
Serial.println("front motor stopped, wheels are aligned");
break;
case 'S':
power_off(car_forward);
power_off(car_backward);
power_off(wheels_right);
power_off(wheels_left);
Serial.println("Both motors stopped");
break;
}
}
}
Here is a video of how we began the hack:
Later in the afternoon, at Venice High School Robotics Club, where the students had just returned from getting a finalist medal in the FRC competition, we built two Sea Perch ROVs:


Many of the students learned to solder for the first time (since the LEGO FIRST competitions they have been competing in don't require much in the way of soldering, but PORPOISE is soldering intensive!)


Wednesday, January 18, 2012
Washington Prep preps their motor controllers


Hi gang! This is your captain Dr. T speaking!
Yesterday afternoon from 3:30 to 5:30 students leading the PORPOISE program at Washington Preparatory High School started soldering their first Adafruit Motorshield and working through their first experience playing with the Arduino board and the Arduino Integrated Development Environment (IDE).


They learned about how to place polarized and non-polarized components (like capacitors and resistors) and experimented with the delay settings in the "Blink" Arduino sketch. They wired a red LED to the microcontroller using a breadboard, got familiar with how breadboards function and experimented with changing the blink rate of the LED.

EZMoney came up with a rule of thumb for placing components on the breadboard.
He said, "let's show our fellow students that the power rails form a line between the plus signs down a column and the minus signs down a column, and that is like the third rail on a railroad track. Touch it anywhere and it gives you power. But when you are putting components on the insides of the breadboard, make sure you look at the numbers and letters on the board. A component's pins shouldn't ever be plugged in so that the component touches two different letters. It should touch two different numbers."


Thanks, EZ, for noticing all that and coming up with that rubric!
For "Homework" (actually, we should call it "homeplay"!) we asked the crew to start playing around with Arduino boards, breadboards and Arduino programming.
"But how?" you are thinking, "We don't have enough boards to give one to each student to take home!"
The answer is to take an excursion into VIRTUAL REALITY!
Two different companies have come up with open source Arduino simulators.
This one from http://www.virtualbreadboard.com/ combines an Arduino and a breadboard but it costs $50:

This one from http://fritzing.org/ is combines an Arduino and a breadboard and costs $0:

Guess which one we are going with?
Installing in Ubuntu was easy. We downloaded from here and extracted (unzipped) the tar.bz file into a new folder we created in the Home folder called "FritzingforArduino" and then simply double clicked on the Fritzing.sh file and clicked on "Run" and it created a Fritzing application.
So now our students can do all their Microcontroller and breadboard testing without spending a penny on hardware and get real familiar with both the programming and electronics side, safely, before committing to application on the real aquatic robot!
And what of the robot itself?
Finally, we unveiled Motion Picture Marine Engineer Brent Spencer's latest design for a low cost surface craft, this time using water bottles as flotation pontoons (the students agreed last week that water bottle trash is despoiling the ocean environment, so we should use it to help clean the place up -- fighting water with water?!)

The idea with the latest Sea Sparrow design is that the lowest cost easy-entry craft wouldn't need it's own motors -- it would mate with the Sea Perch and the Sea Perch motors would propel it through the water to the desired location.

Once the Sea Sparrow reached the location, robotic grippe claws would release the Sea Perch, which would descend underwater to accomplish it's mission, storing data from the MIT Sea Perch Sensor Suite on the SD card.

Fun!
Purposely Open Source: UBUNTU Apps we Use in PORPOISE

Ahoy thar, ya scalliwags!
Here at PORPOISE, when teaching young people how to use their computers to become better citizens and to learn Science, Technology, Engineering and Math (STEM) and Digital Engineering for Multi-Media Occupations (DEMMO Productions), we adventurers on the high seas of cyber-education have an answer to the Stop On-Line Piracy Act (SOPA) now being so furiously debated by the nation that we think is a win-win!
Our answer is stay open-source and our perspective is to stop looking at software and digital media as a (much over-milked) cash cow and learn to see them instead as part of the foundational infrastructure smart nations need and must make available free of charge to ensure high productivity and competitiveness.
The dot-com bubble burst. It is over. Deal with it.
Humanity used the huge investments made during that era to create all sorts of fantastic tools -- software for word processing, for calculating through spreadsheets, for creating art and video and music, for manipulating images and sounds and even things in the real world, like robotic hardware.
Creative artists created a wealth of songs and films and other media that do a great job of informing a world-wide audience about our languages and cultures, our dreams and fears, our histories and our challenges. They have created "games" that help the young and old perfect their hand-eye coordination and develop their imaginations and social skill-sets.
The network professionals have created ways for us to talk across oceans and even to see and hear and interact with one another in real-time through group video conferencing and on-line in ways that long ago seemed the stuff of comic books and science fiction.
The so-called "intellectual property" developed during this time exists as testimony to the marvelous intellect of the human race. The works exist. They can't be un-invented.
It is time to put them to service for all humanity.
But because many people still want to hold on to digital productions and use them to continue to garner profits through royalties (even though the transaction costs of duplication are close to zero), there will inevitably be conflicts about who gets to use what when and how. And those who don't have much money or time but want access to those tools will be tempted to pirate them.
We want to avoid all of that.
Fortunately, the open-source movement has also matured during the dot-com bubble years. Operating systems and software exist today that is as good as anything out there on the commercial market. Cultural/educational/entertainment material made "of the people, by the people, for the people" exists (through blogs and youtube and Vimeo and others) to keep us enthralled while we learn to make sense of the world through the arts.
We now have all the tools we need to level the playing field and give equal access to the best education available on the planet to everyone on the planet.
So in this program we are going to stay completely OPEN-SOURCE and OPEN-ARCHITECTURE. We invite you to by-pass the entire SOPA debacle by staying in a realm where no piracy is possible because everything has been made available for free to begin with!
And just for the record, mateys -- since in this program we follow the cyberpunk clarion call "information longs to be free", we'll be doing this entire program using LINUX BASED OPEN-SOURCE HARDWARE AND SOFTWARE and puttin' it all in the public domain.
We're countin' on you to start workin' with the same UBUNTU Linux distribution we use and "abandon ship" when it comes to Windows or Mac for this educational initiative (go ahead and use them in your everyday life -- we do too -- but in PORPOISE our purpose is to make robotics education accessible to EVERYONE, from the richest to the least-wealthy, from Tarzana to Timbuktu, so we like the software solution that South African astronaut Mark Shuttleworth came up with to close the digital divide: Ubuntu.)
And here is a nice definition of Ubuntu from About.com:
1 No Future Without Forgiveness: A Personal Overview of South Africa's Truth and Reconciliation Commission , Desmond Tutu, © 2000.
"Ubuntu is a Nguni word which has no direct translation into English, but is used to describe a particular African worldview in which people can only find fulfillment through interacting with other people. Thus is represents a spirit of kinship across both race and creed which united mankind to a common purpose.
Archbishop Emeritus Desmond Tutu has said "Ubuntu is very difficult to render into a Western language…It is to say. 'My humanity is caught up, is inextricably bound up, in what is yours'…"1
We've been teaching Ubuntu in places as diverse as Maasai villages in Kenya and the slums of Cairo to the 'hood in Los Angeles. By having a common and evolving platform for robotics development where all the software tools are free and open-source we ensure a dialog between users and cultures that will erase the gulfs dividing us and give everybody a chance to participate in "the great conversation" that humanity has been having since we achieved self-awareness and began to look up at the stars...
Now back to our anti-pirate voice:
"Har be an evolving list of the Ubuntu Software we reckon to use in this har program for various and nefarious porpoises related to aquatic and maritime robotics -- and all the media and pedagogical (thar be a big word, aye!) projects associated with said STEM educational goals!
I'll be updatin' her from time to time as I makes me own discoveries so check back frequently. And if ye have yer own recommendations, do let us know down under in the comments section and we'll add 'em to the list!
Arrrrh!"
(Note: we give the link to the relevant websites for informational purposes, but once you are in Ubuntu you can download everything for free from the Ubuntu Software Center for easy install).
Taking Screenshots:
Shutter
(Shutter also works as a decent and quick image editor for cropping and flipping etc.)
Resizing pictures:
Converseen
Managing photographs:
Shotwell Open Source Photo Organizer
Making 2D pictures (the Ubuntu equivalent of Photoshop):
GIMP
3D Modelling, Animation and Game Creation:
Blender
Free model resources for Blender:
http://e2-productions.com/ (this is where I got the skull for the logo I created above)
http://www.katorlegaz.com/3d_models/ (this is where I got the battery to make the skull and crossbones batteries in the logo above).
Word Processing/Spreadsheets/Databases (equivalent to Microsoft Office):
http://www.openoffice.org/
Web-browsing:
Firefox
PDF Viewing (similar to Acrobat Reader):
Evince Document Viewer
PDF Creation and Page Layout (similar to Adobe PageMaker)
Scribus
Video Production:
Kdenlive: The best way to install it is to use the instructions here, starting with installing MTL and ALL the dependencies and THEN install Kdenlive from here.
Don't use the Ubuntu Software Center for this or you may get problems (MTL missing warnings and crashes!). But it is worth it.
Cinelerra
(This one you have to install from source using these instructions if you get it from here or these if you get it from heroinewarrior link above; it can't be found in Ubuntu Software Center like most of the others. There are a few more Linux video editors listed here:
http://www.cyberciti.biz/faq/top5-linux-video-editing-system-software/).
I have to say, having worked as a video editor for years on both linear AB Roll systems and non-linear systems, from AVID to Media 100 to Final Cut Pro to Adobe Premiere, that I vastly prefer Kdenlive to Cinelerra. I couldn't get the audio working in Cinelerra and it is hard to do simple edits if you are used to the stretchable timelines in Final Cut or Premiere. Kdenlive is more like those programs in any event.
(Note: To properly install Ubuntu 11.10 Oneiric Ocelot, this tutorial is very helpful:
http://www.techdrivein.com/2011/10/15-things-i-did-after-installing-new.html as is this one about repositories:
https://help.ubuntu.com/community/Repositories/Ubuntu)
_____________________________________________________________
If you are interested in how an economy might work in an age of almost cost-free software, check out this great essay by Joel Spolsky where gives a brief economics lesson as he talks about how to properly price software and gives the advice "charge $0.05 for your software ... unless it does bug tracking, in which case the correct price is $30,000,000."
Joel also has a great essay giving advice for Computer Science Majors who might be worried about getting jobs after college. His thinking is seminal in our education work, so check it out!
Subscribe to:
Posts (Atom)